How to publish a blog article
A tutorial on notebook, markdown, Word doc article writing
Introduction
All RFPT blogs are created using the Github Pages1 and to modify their content one needs a github account. There are at least two ways to publish a blog article. Here, we will present how to upload an article using the github web-interface. If you’re more familiar with github, you may as well clone the repository locally, modify it as it fits, and push to the master branch via a pull request.
You can download the blog templates from here:
Choose your blog category
The RFPT has several blogs. If you want to share information about a scientific or educational event (seminar, conference, etc.), submit your article to the Education blog. If you want to write an article on your MSc or PhD thesis, choose the Research blog. Finally, if you want to publish a tutorial, go with the Tutorials blog. The corresponding github adresses, i.e., where to actual commits are submitted, are as follows:
File formats
An article can be submitted as a jupyter notebook, a markdown file or a Word file. Whatever the input file, a strict naming convention must be followed and it goes like this:
-
YYYY-MM-DD-*.ipynbfor notebooks -
YYYY-MM-DD-*.mdfor markdown files -
YYYY-MM-DD-*.docxfor Word docs
The YYYY, MM and DD correspond to the year, month and day of the publication (remember to separate them by a hyphen). The * symbol should be replaced with an arbitrary title.
Location in the github folder structure
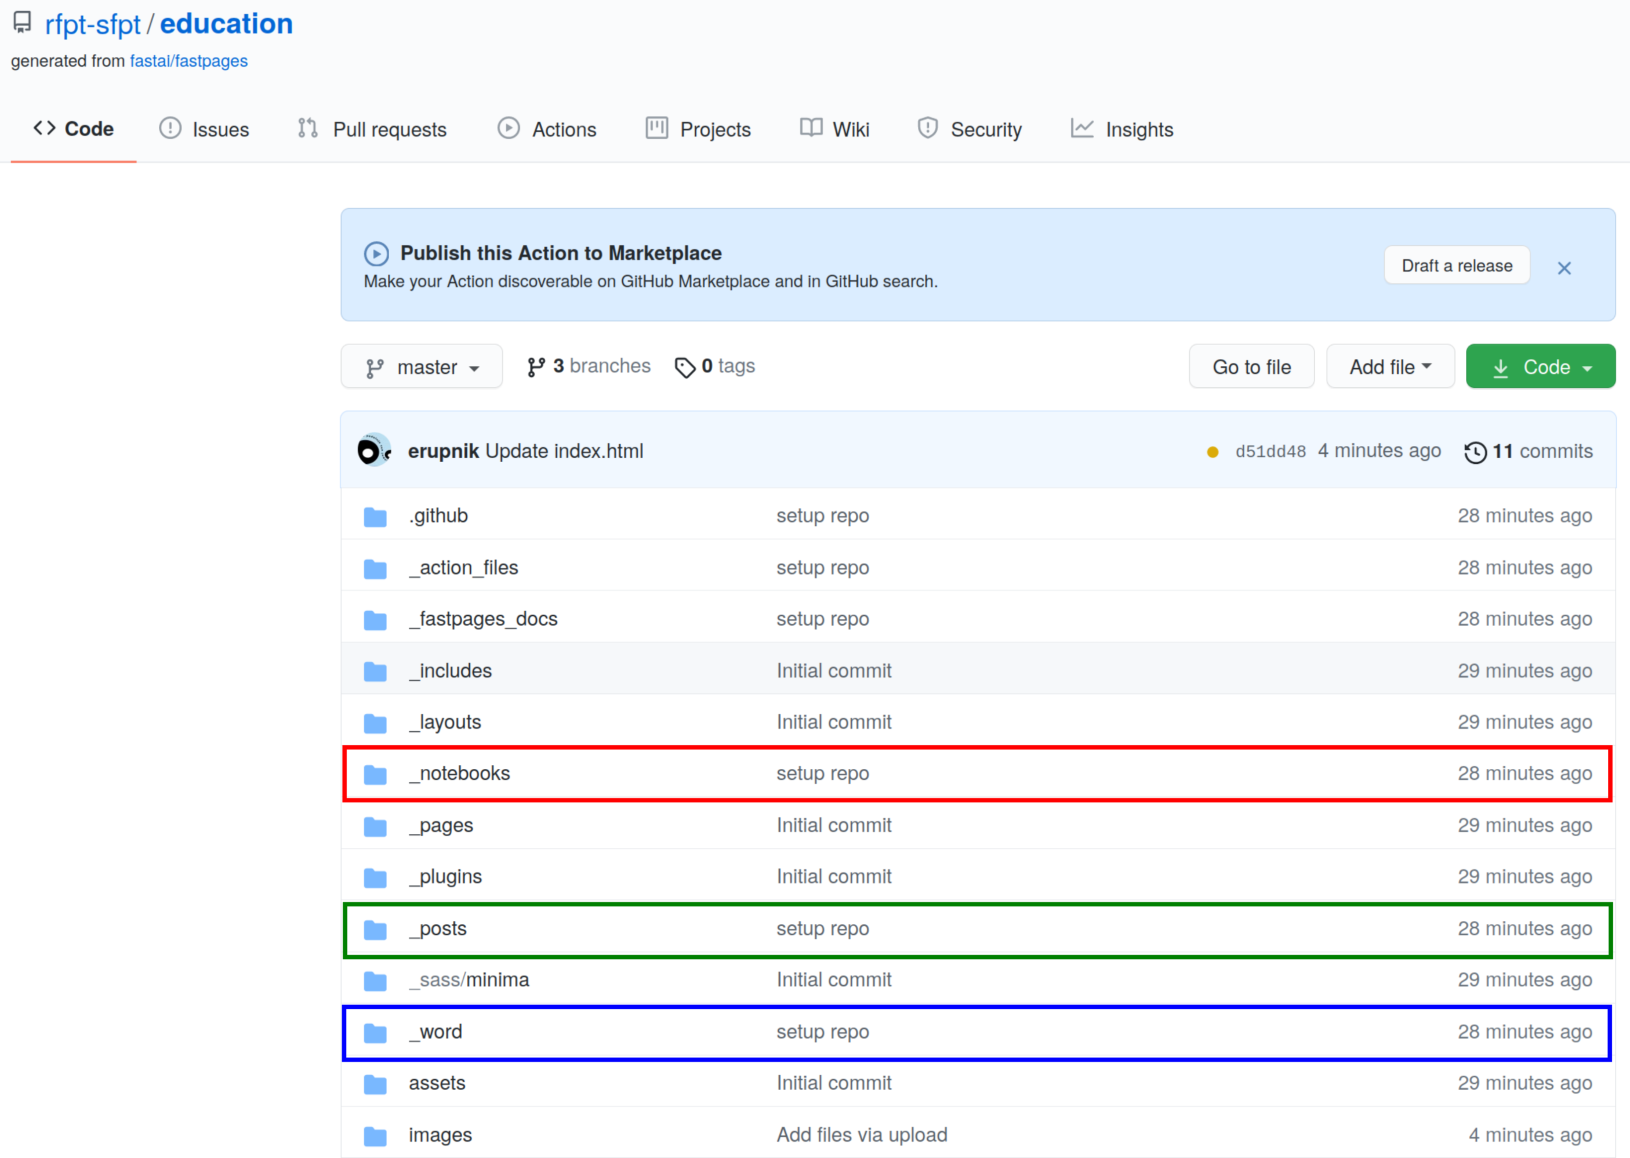
Depnding on the file format of your article, you should place it in their corresponding folders. If you’ve written
- a notebook article, place it inside the
_notebooksfolder, - a markdown article, place it inside the
_postsfolder, and - a Word doc article, place it inside the
_wordfolder.
In the following figure, the folders are marked with red, green and blue rectangles, respectively:

Write or upload and submit
Markdown article
Please take a look at this post to learn some basic markdown functions such as defining a list/table, or embedding an image or even a piece of code in your post!
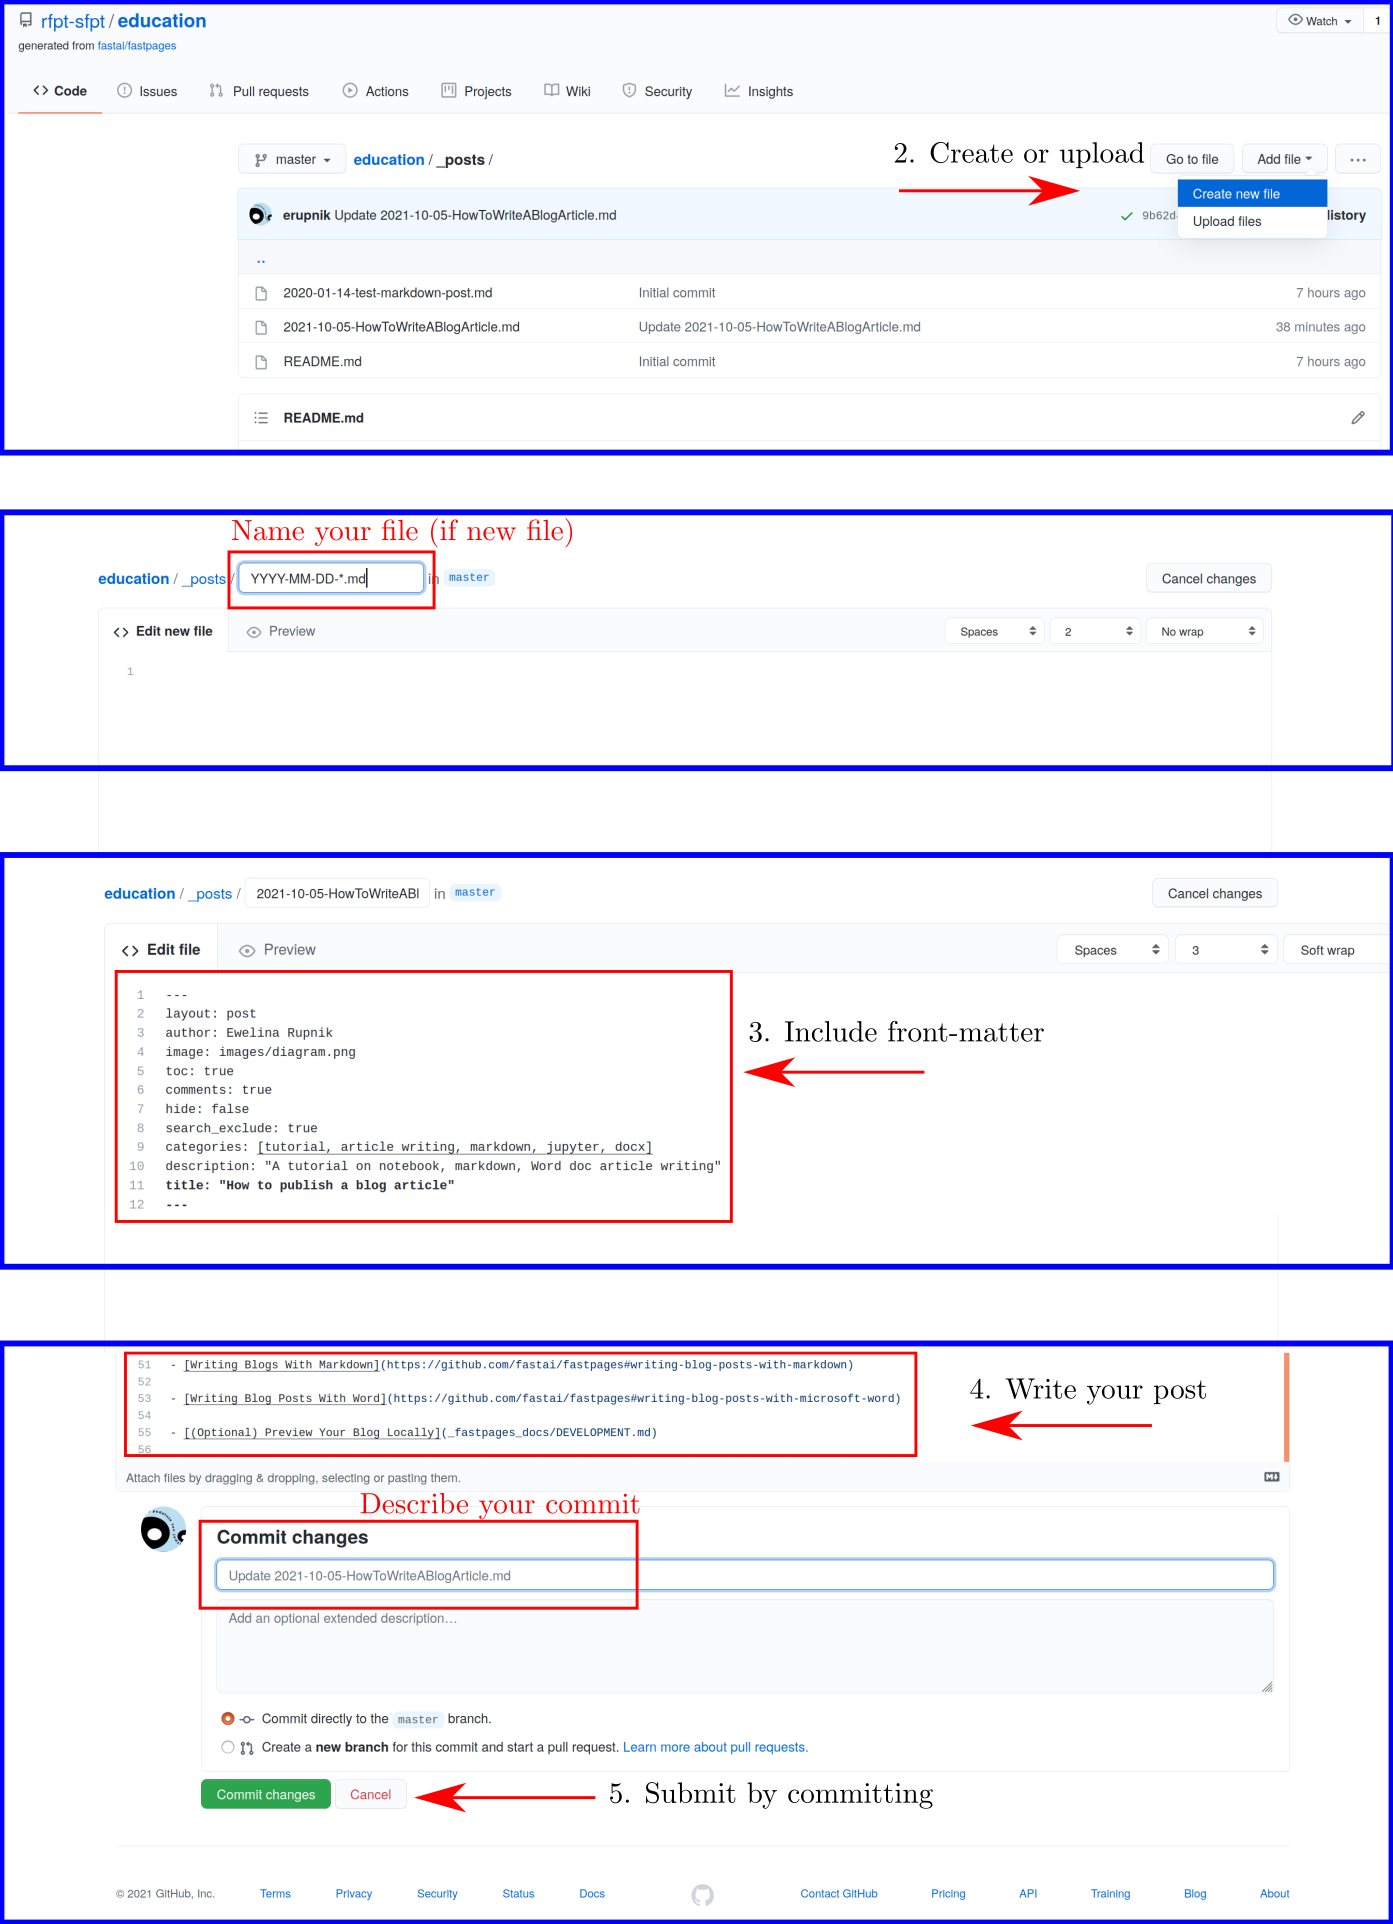
You’re now ready to create or upload your article. Below find the instructions on how to succesfully submit your post.
- Go to the github address corresponding to your blog
Tutorials : https://github.com/rfpt-sfpt/tutorials Education : https://github.com/rfpt-sfpt/education Research : https://github.com/rfpt-sfpt/blog - Upload an existing file or create a new one
- Include
front matterto describe the metadata of the article such as author, title, description, tags, image. You’re highly encouraged to include an image, which will be displayed on the main page, next to your article. Do not forget to upload the image file inside theimagesdirectory prior to submitting your post. - Write the content of your article using the markdown language
- Submit the article with the
Commit changesbutton. This will create the so-calledpull requestthat one of RFPT moderators will need to confirm and merge with the blog content.
The above instructions are summarised in the figure below:

Notebook article
If you created a ipnyb notebook file, fastpages allow to automatically convert it to its blog-like version. It’s sufficient to upload your notebook in the _notebook folder, and follow the YYY-MM-DD-*.ipynb naming convention. Please refer to this examplar post for more information.
Word article
You can publish an article using the Word docx file, however, it does not seem to be the recommended way of interacting with the fastpages blog. Follow this tutorial for more information.